The Snipping Tool of Windows 11 will soon make you GIF from your screen recording. We told about the previous month, and here are some more details.
You may know that the snipping tool lets you record the video and save them as .MP4 files. This is good, but animated GIF is commonly used to share small materials on social media, chat apps etc. Animated GIFs are also useful for tutorials, as you can easily indicate readers what to do to enable/disable them, or teach them how to use something.

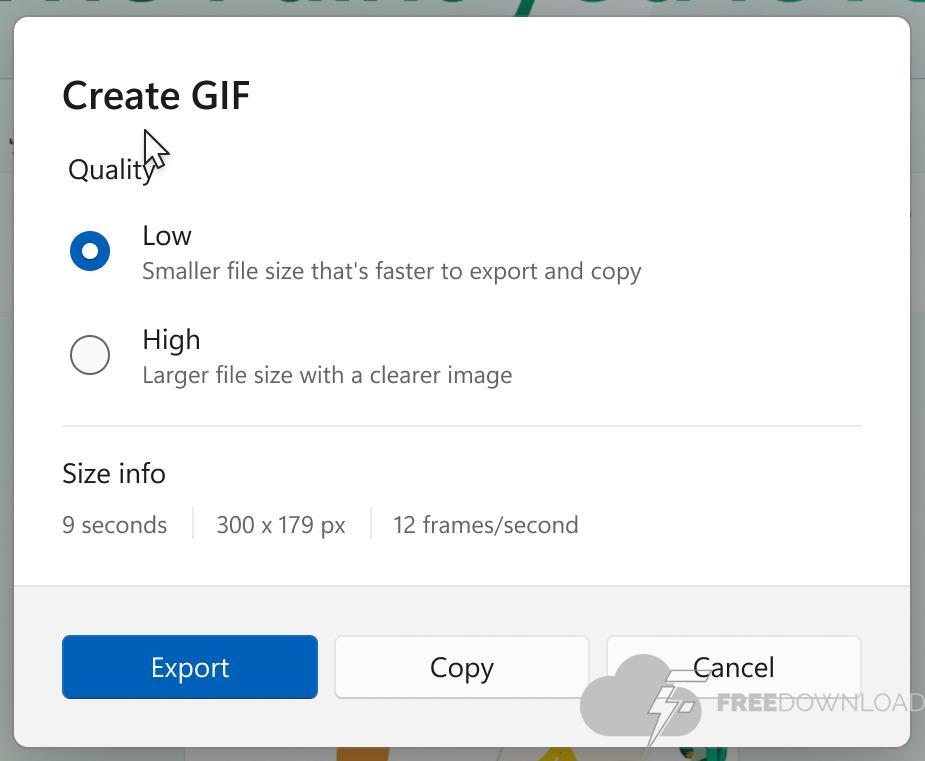
To start video recording in the app, hit the Win + Shift + R Keys. This will bring the screen recorder, proceed as normal and start video recording. When you turn off the recording, and the preview opens, the snipping tool will display a button that is marked “GIF”. It is an export GIF device. Click on it, and the app will ask you to select a favorite GIF quality. You have two options: low and high quality.
This panel displays the duration of GIF in seconds, resolution in pixels and number of frames per second. Users can choose recording to save the GIF file, or copy it on the clipboard.
Microsoft says GIF exports of snipping tools are limited to videos that are 30 seconds or less. If, however, your video is long, it will offer to export the first 30 seconds of the video. It seems a bit silly, I always felt that it was a bit strange that the snipping tool does not come with a basic image/video editor. Well, for at least once, it is not an AI-powered feature. Speaking about, Microsoft is testing some AI features in paint, notepad and snipping tools.
Anyway, GIF exports are available for users the Snipping Tool version 11.2505.21.0, who has enrolled in the Canary or Dev channels of the Windows Insider program.
If you need a simple app that can record and make an animated GIF, and can also edit them, take a look at the schentogif. It is free, open source.
Thanks for reading..